fbpx

Recent Posts

Are Long Island Iced Teas Girly?

Many men have probably been made fun of when they order a Long Island Iced Tea by their buddies because people think it’s kind of girly and doesn’t pack a punch. The thing is, it’s probably at least twice as strong as whatever cocktail that they ordered. The name just doesn’t sound as masculine as say a Manhattan or an Old Fashioned.

So is a Long Island Iced Tea Girly? The short answer is no. While it is sweet which might make it appeal to certain members of the fairer sex, it also contains a lethal dose of many different liquors, making it quite potent, which could just as easily make it appealing to men as well.

Keep reading for tons more information on this wonderful boozy delight, including the ingredients comprise a Long Island Iced Tea as well as the recipe, history and even some fun facts about this wonderful, and gender neutral cocktail.

History of The Long Island Iced Tea

Before we go any further, let’s find out the two different tales of how this delicious concoction came to be. It’s up to you to decide which one to believe.

Let’s start with the earliest story. In the roaring 20’s (and during Prohibition) a native of a Kingsport, Tennessee community referred to as Long Island came up with a devilishly tasty though dangerously effective cocktail called the “Old Man Bishop”. His name…wait for it…Old Man Bishop. The humility on this one. Combining equal parts tequila, gin, vodka, rum, whiskey and maple syrup, it sounds a bit like Old Man Bishop just decided to combine whatever was behind the bar in one glass just to see what it tasted like. Turns out it wasn’t half bad.

Apparently he handed down his famous recipe to his son Ransom, who made some slight changes to it, making it very similar to the version widely served around the world to this very day.

The second telling takes place in 1970’s New York and involves a man named  Robert “Rosebud” Butt. A bartender at the Oak Beach Inn, it is said that Butt created this drink as an entry into a local cocktail crafting contest. His version replaced rum with triple sec. According to Butt: “My concoction was an immediate hit and quickly became the house drink at the Oak Beach Inn. By the mid-1970s, very bar on Long Island was serving up this innocent-looking cocktail, and by the 1980s it was known the world over.”

While no one knows the exact history of the Long Island Iced Tea, nobody in their right mind can deny its potency.

Now that you know where it came from, let’s find out how to make one!

What are the Ingredients in a Long Island Iced Tea?

There are actually a fair amount of liquids that comprise a typical Long Island Iced Tea. Let’s look at them in a bit more detail:

Gin

The types of gin used in this recipe can vary widely as it is one of the most broad categories of liquors. Common store bought brands include Beefeater, Bombay Sapphire, Hendrick’s, and Seagram’s.

Rum

Typically a white rum is used although some variations allow for a darker version of this tropical liquor. Common, inexpensive white rums that are readily available include Captain Morgan’s, Bacardi, and Malibu.

Tequila

This ingredient is totally up to the maker’s preference. Light or dark tequilas work equally well in a Long Island Iced Tea. Some great tasting versions of Mexico’s finest are Jose Cuervo, Don Julio, Patron, and 1800.

Vodka

Any vodka can technically be used depending on how bad of a hangover you can tolerate. Some moderately priced brands include Absolut, Ketel One, and Tito’s. If you’re pouring a top shelf Long Island, grab some Grey Goose or Belvedere.

Triple Sec or Sour Mix

The type of triple sec or sour mix you choose will not make or break this cocktail. Anything decent you can find at the supermarket will be more than fine.

Lemon Juice

Grab three or four fresh lemons from your local market and start squeezing. If you just don’t want to go the extra mile, go ahead and buy a small container of lemon juice. It won’t taste quite as good but it should suffice.

Cola

A splash of whatever cola is on hand is administered once everything else has been poured into the highball glass. This gives it that slightly darker look on top.

How To Make A Long Island Iced Tea

Once you acquire all the necessary ingredients, and there are a fair amount, making a Long Island Iced Tea is actually quite simple. Just follow these easy steps and you’ll be enjoying one in no time!

Time to make 5 minutes

Serving Size 1

1. Fill a cocktail shaker with ice.

2. Pour 1/2 fluid ounces of gin, rum, tequila, vodka, triple sec and sour mix into the cocktail shaker.

3. Cover and then shake.

4. Pour into a Highball or Collins glass.

5. Add a splash of cola for color.

6. Garnish with a fresh lemon slice.

There you have it, a beautiful and boozy delight!

Nutritional Facts

Calories 256

Total Fat 0.2g

Total Carbohydrates 13g

Sugars 11g

Characteristics of a Long Island Iced Tea

Here are a few of the main characteristics that set the Long Island Iced Tea apart

What Does a Long Island Iced Tea Taste Like?

In short, very boozy. Because of all the different liquors present, you can’t really taste one more than another. It is very apparent even after just one sip that the Long Island Iced Tea has a very high alcohol content. 

Most people are able to taste the triple sec or sour mix though, due to their slightly acidic, citrusy taste.

What Does A Long Island Iced Tea Look Like?

A proper Long Island Iced Tea is usually poured into a highball glass with several cubes of ice in it. The color of the concoction is normally a light brownish hue from the mixing of the cola to the many different clear liquors. It is sometimes lighter on the top than the bottom if the bartender was feeling charitable and finished the pour off with one last little bit of vodka.

When To Drink A Long Island Iced Tea?

While you can drink a Long Island Iced Tea year round, we find them most pleasing during the summer months or in warmer climates. Due to their boozy nature it is usually best to imbibe them slowly as they could easily make a person tipsy after one or two strong pours. 

They are perfect if you are having a light dinner such as a Cobb salad or are just grilling up burgers or chicken out back with some friends.

That is not to say you can’t enjoy them in colder climates though, as they will definitely warm your insides up after just a couple sips!

Tip: If you are prone to heartburn or have acid reflux disease you might want to limit your intake due to the presence of the sour mix. Of course, you could always just do away with the sour mix altogether to allow yourself the enjoyment of this wonderful cocktail.

Drinks Similar to the Long Island Iced Tea

  • East Hamptons Iced Tea: Swap cola for cola syrup and add a bit of saline.
  • Electric Iced Tea: Blue curaçao instead of triple sec and use lemon lime soda in place of cola to give it a bright blue hue.
  • Fog Cutter: Rum, gin, cognac, sherry, orange and lemon juices.
  • Hawaiian Iced Tea: Pineapple juice instead of cola.
  • Long Beach Iced Tea: Substitute some cola for cranberry juice for a west coast delight.
  • Purple Rain: Replace the triple sec with Chambord and then add lemon lime soda in place of cola for a very jazzy raspberry drink.
  • Texas Tea: Add another 1/2 ounce of bourbon if the five liquors already in your glass aren’t enough to get the job done.
  • Zombie: Three types of rum and some Absinthe give this drink more alcohol than a Long Island Iced Tea. Add some lime juice, grenadine and bitters and you have quite a potent delight.
  • Royal Long Island Iced Tea: Double each of the ingredients, yes, all eight of them, and find a bigger glass while you’re at it. Have fun!

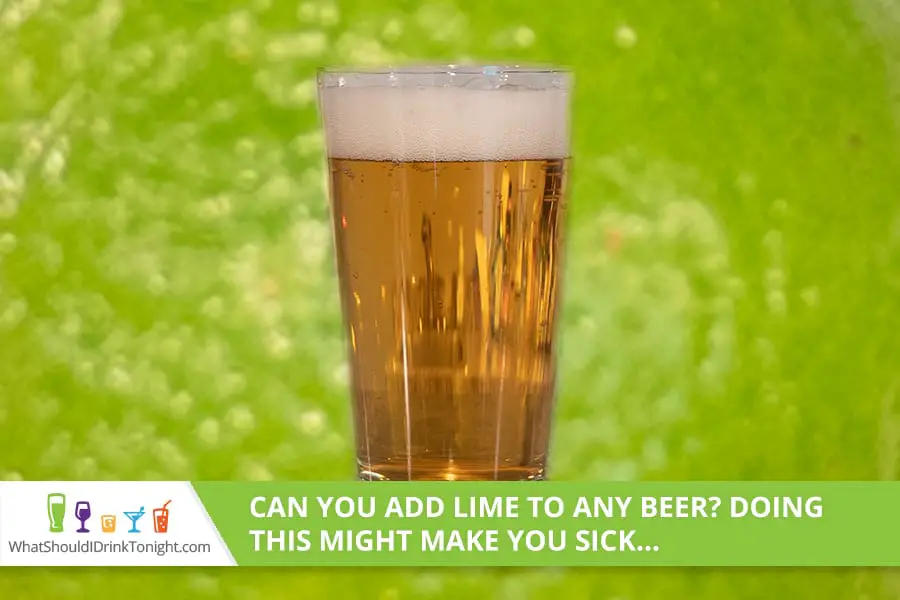
Can You Add Lime To Any Beer? | Is it Safe?

can you add lime to any beer

Some commercials make a beer on the beach look so refreshing and attractive. Palm trees swaying in the soft breeze, as bare manicured toes dig into soft sand, and a tanned hand squeezes a fresh lime into a beer bottle under the tropical sun. Sounds divine. But hold up on that last part.

So, can you add lime to any beer? Yes you can, just don’t do it in direct sunlight. The fact is you could get “lime disease” from cutting and squeezing limes into your beer when exposed to the UV rays of the sun. This can cause serious skin irritation and blisters, among other things.

If you love the way a beer tastes when you put lime into it, don’t worry, there might be a way for you to keep adding lime to your beer. Let’s take a look at the ins and outs of adding a lime to your favorite brew.  Let’s take a minute to look further into this now.

Why Do People Like Adding Limes to Their Beer?

So why exactly do people feel the need to put a lime in their beer in the first place? There are actually a couple of logical reasons as well as a couple related to the taste.

  • Some people believe that the lime will clean the top of the bottle by eliminating any lingering germs due to the acidic content of the lime.
  • Limes can also mask the taste of a skunky beer, but who’s buying skunky beer in the first place?
  • A lot of people think that it looks pretty cool to have that lime wedge in the top of a Corona or other beer.

The thing most neglect to think about is the fact that most bartenders touch the limes with their bare hands as they put it in your beer. This is a huge health code violation because no one is supposed to have bare hand contact with ready to eat food. Just because the lime is going in the beer bottle doesn’t mean it isn’t still food.

Can You Add Lime to Any Beer?

You can do it, but you’ve got to take the proper precautions, which are mainly making sure you’re not exposed to a lot of direct sunlight. If you are exposed to a lot of sunlight you could get “lime disease,” also known as Phytophotodermatitis (It is important not to confuse this disease with “Lyme disease,” which is totally different).

Phytophotodermatitis can occur when you squeeze or cut a lime in direct sunlight. Limes can undergo a chemical reaction due to the UV rays of the sun. This can lead to your skin becoming irritated and even burned.

This disease can be mild, moderate, and even severe. Symptoms may include the following:

  •     Small to large blisters
  •    Skin irritations
  •    Conditions that are like second-degree burns
  •     Redness
  •     Brown marks that can last for months before fading

Also, you most likely will be in some pain until your disease clears up. Now, let’s take a closer look at why limes can cause Phytophotodermatitis.

Why Do Limes Cause Phytophotodermatitis?

There is a chemical found in limes called furocoumarin that can cause a toxic reaction when combined with the ultraviolet rays of the sun. This reaction can result in “lime disease,” also known as “Phytophotodermatitis.”

The effects of the reaction can begin within minutes of the lime juice being exposed to the sunlight. In most cases, a rash will appear on a person’s body within 24 hours. This rash can burn and become very painful.

Precautions to Take When Adding Limes to Beer

If you really love the taste of lime in your beer, don’t worry, you can decrease your odds of getting “lime disease” by cutting, squeezing, and adding limes to beer when you are out of direct sunlight.

So, make your lime/beer combo in the house and not out in the sun. A few other precautions you can take include the following:

  •     Wear a large-brimmed hat.
  •     Cover up your legs and arms.
  •     Sit under a big umbrella.
  •     Wear gloves.
  •     Use an SPF-50 sunscreen with broad-spectrum UVA/UVB.

Taking these precautions can help you beat the odds of getting Phytophotodermatitis, so why not give them a try the next time you decide to add lime to your favorite beer.

A word of caution: The risk of skin irritation is not limited to the type of alcohol used. In this case, we are talking about beer. The same risk is present, whether you are adding the lime to beer, a margarita or a vodka-tonic. It is the lime and sunlight that is the issue here.

Can You Add Lemons to Beer?

Some people have changed to adding lemons to their beer instead of limes, let’s take a quick look to see if it is safe to switch from adding lemons instead of limes to your beer.

The fact is you should be concerned about getting lemon juice on your skin when in direct sunlight. Yes, it could cause you to get Phytophotodermatitis, which can be painful.

However, using the same precautions mentioned above, such as cutting your lemons indoors, then squeezing them into your beer before going out in direct sunlight, will help decrease the odds of getting the disease.

Now, let’s talk a little bit more about Phytophotodermatitis just in case you do experience a rash or burn after mixing up your favorite lemon or lime beer drink.

Is Phytophotodermatitis Contagious?

According to Fairview.org, “Phytophotodermatitis is an inflammatory reaction of the skin.” It is often referred to as “lime disease” or “margarita disease.” It usually begins with a burning sensation; then, a red rash will appear, which in most cases turns into dark marks or blisters.

However, thankfully, it is not contagious.

You can feel the effects of the disease within minutes of being exposed, but it can take up to 24 hours before you will notice the rash and skin burns appear. The rash may get worse for 1 to 3 days.

Does Phytophotodermatitis Go Away?

The fact is Phytophotodermatitis isn’t as common as other types of dermatitis. However, it can cause nasty blisters to appear on the skin. The blisters and marks caused by the disease can be very painful.

Phytophotodermatitis usually goes away on its own, but in some instances, a person might need to seek the help of a dermatologist.

Some people choose to use home care treatments for the disease before they seek professional help, so let’s talk a little about the things you can do at home for your disease now.

Ways to Treat Phytophotodermatitis

There are some home care remedies for treating Phytophotodermatitis; you can try out; these include the following:

  •        Use ice packs: On the first day, you can put ice packs on the infected area to help relieve the pain. Also, you can find first aid creams at your local pharmacy that may also help with the pain.
  •        Apply a dressing: Some people find it helpful to apply a dressing to the burn. If you do put a dressing on your infected area, make sure to change it once a day. Also, remember a dressing might stick to your skin. If this happens, dampen the bandage with warm water and then carefully remove it.
  •        Wash it: You will need to wash the infected area at least once a day with soap and water. Remember to simply pat it dry with a towel.
  •        Apply hydrocortisone: This will help the inflammation around the infected area.

If the rash and burn don’t go away on its own, then you should see a medical professional. A doctor can usually diagnose Phytophotodermatitis with a simple physical exam. They may even be able to diagnose it just by asking you questions about your recent activity.

You should be aware that sometimes the disease gets misdiagnosed because it somewhat resembles a sunburn, fungal infection, chemical burn, and even a poison ivy rash.

Well, I hope this helps you answer whether or not you can add lime to your favorite beer. Remember, if you are going to add that lime to your favorite beer, then take as many precautions as possible. Also, if you do happen to notice a rash or burn on your skin that doesn’t go away, be smart, and act quickly to treat it before it worsens.

What Happens If You Add Sugar to Beer?

what happens if you add sugar to beer

Sugar is food for yeast, and alcohol is what is produced when yeast metabolizes sugars, so adding sugar to beer is a necessary step in the process. The key is to know when to add the sugar, how much to add, and what kind to add.

What happens if you add sugar to beer? There are four primary reasons that you would want to add sugar to beer. If you add it during primary fermentation, it will increase the ABV of the beer. You can also add sugar to lighten the body or to alter the flavor or color of the brew. Bottle conditioning your beer is another reason you would add sugar.

Homebrewing has become an extremely popular pastime as the increase in microbreweries and craft beers has continued over the past 10-15 years. Whether you’ve got some experience in this area or are just starting to think about giving it a try, knowing how and when to use sugar is an important part of the process.

How and When to Add Sugar to Beer

The process of setting up a beer will vary greatly depending on the methods that you are using. Regardless of how you get there, you will eventually arrive at a point where you have what brewers call the “wort.” This is the result of combining and heating the basic elements of beer: water, grain, and flavoring agents (hops).

Once you have your wort and it has cooled to the point where it will not kill the yeast, you take the step of pitching the yeast. It is the yeast feeding on sugars in your wort that produces alcohol. If you add sugar to your wort during the cook or during the “primary fermentation” phase of brewing, it will result in a higher alcohol content for your beer.

Depending on the types of sugar you add, and precisely how far along your beer is in the fermentation phase, the result might be a lightening of the body of the beer. Alcohol is lighter than water, and so beer with higher alcohol content should have a lighter body. Certain sugars can also impart color and flavor characteristics to your brew.

When your beer has finished fermenting, it will be lightly carbonated or mostly flat. One of the easiest ways for homebrewers to carbonate beer is called bottle conditioning. This method requires you to add additional sugar. Once you seal the beer in the bottle, the fermentation of that final bit of sugar inside the sealed bottle will have the effect of force carbonating your beer.

The Myth of Sugar and Cidery Beer

Some brewers and craft beer enthusiasts will swear that adding sugar to your beer will give the beer a cidery flavor. This is a myth that is easily disproved to anyone who is willing to listen to reason. The kinds of off-flavors that people describe as cider-y are almost always traceable to poorly sanitized brewing equipment or some other misstep in the brewing process.

While cidery flavors should not be blamed on sugar, there are certain sugars that have noticeable effects on the finished flavor of beer. Since there are so many different kinds of sugar and so many sources that you can incorporate in your brewing, it’s worth taking a look at what those are.

Kinds of Sugars and Where to Find Them

As we said above, beer’s primary ingredients are water, grain, and hops. Grain contains high starch contents, but heating the water and the grain together breaks those starches down into sugars. When your mash is complete, and your wort is cooling, there will be fructose, maltose, glucose, and sucrose present. Each of these sugars is fermentable by beer yeasts.

Fructose

Fructose is a rapidly fermentable sugar that is derived from a variety of starches. Fructose is also known as Levulose.

Glucose

Glucose is another very fast fermentable sugar. Some brewers use the terms “Glucose” and “Dextrose” interchangeably, though Dextrose is derived specifically from corn.

Sucrose

Rapidly fermentable by beer yeast, Sucrose is a natural fermentable found in malts.

Maltose

A slower fermentable, it occurs naturally in malt and other sweeteners.

Lactose

Lactose is non-fermentable by beer yeast, though it can be fermented by different types of wild yeast. It imparts a sweet flavor in beer and is commonly used to turn stouts into “milk stouts.”

So then, every source of sugar that you can add to your beer, from maple syrup to table sugar, is ultimately going to resolve as one or more of these types of sugars. A visit to your local homebrew supply store will give you a good idea of just how many options there are for adding sugars to your beer.

Candi Sugar

This is a very popular option for Belgian-style beers and strong ales. It is a slowly crystalized sucrose that can end up white, amber, or brown in color. The darker the color, the more caramelized the crystals and the more of an effect it will have on the color and flavor of your beer. These sugar sources are used to lighten the body of the beer and increase the alcohol content.

Corn Sugar

As we said above, corn sugar is known as Dextrose and is molecularly identical to Glucose. Corn sugar is what most brewers prefer for bottle conditioning their beer. Dextrose can also be used to lighten the body of the beer and increase ABV%.

Specialty Sources

There are many other sources that you can experiment with in your brewing recipes. Some, such as maple syrup, molasses, and agave syrup, have become pretty popular. Others like beet and cane sugar, palm sugar, and raw sugar are riskier to use in the brewing process because they offer more potential problems than they do upsides.

Sugary Beer and Bottle Conditioning

If you’ve ever been getting ready to pop the top on a bottle of homebrewed beer only to find yourself holding onto a miniature version of old faithful, then you know just how bad things can get when bottle conditioning goes wrong.

There are two main ways to perform bottle conditioning. The first is bottle priming, a method that has brewers place sugar directly into the individual bottles before filling them with beer. This method makes it difficult to control the exact weights of fermentable sugar that go into each bottle. When too much sugar goes in, the beer geyser is the result.

The other way to bottle condition beer is to batch prime your beer. This method has brewers add a set amount of fermentable sugar to the whole batch of beer before portioning it into bottles. Because the fermentables are being introduced into a larger volume, small measuring errors make less of a difference.

Giving Sugar a Try

Are you ready to try adding sugar to your next homebrew project? If you’ve read all of the information in this article, you definitely know enough to begin the process of experimenting. Ultimately it will be experimentation and experience that will help you develop an approach that suits your brewing process and your taste in beer.

Half of the fun of homebrewing is tinkering with the results until you’ve gotten everything just perfect and then challenging yourself to do it that well every time. Think of adding sugar as one more tool in your brewer’s tool kit.

It can be a great way to increase the alcohol content of the beers you brew. As you experiment, you’ll find that you can also affect changes on the body, color, and flavor of your beers that range from subtle to significant. Give it a try and see what you can come up with.

What Are Craft Cocktails?

Craft cocktails have exploded onto the scene in a major way. A lot like the rise in craft beers and artisanal foods, craft cocktails are made by people that care about their craft and take a great deal of pride in creating the best experience possible for their customers. My interest was piqued, so I did a little digging and found some interesting things about craft cocktails that I’d like to share with you.

So let’s start with the obvious, what are craft cocktails? Craft Cocktails refer to cocktails where every ingredient is of high quality and is specifically tailored to the drink. There is a lot of attention to detail, and they usually take longer to make, but a good craft cocktail is definitely worth the wait. 

Craft cocktails are made by bartenders who are actual trained mixologists (i know, be more pretentious), as opposed to someone just throwing together a long island iced tea at Applebee’s as quick as they can and calling it a day. There are many characteristics that distinguish craft cocktails from your everyday drink, so let’s find out what makes these beverages so unique, as well as some answers to other commonly asked questions about these drinks.

What Makes Craft Cocktails Different from Standard Cocktails?

Craft cocktails are differentiated from what would be considered standard cocktails (Martini, gin and tonic, etc…) in more than a few ways. Let’s take a look at some of the characteristics of a good craft cocktail.

  • Craft cocktails are made by someone who can whip you up some of the classics like a Negroni, Old Fashioned or Manhattan without breaking a sweat. These master mixologists want to challenge themselves by experimenting with new combinations and flavors, trying to find just the right mix that really sets off your taste buds. They have tried and failed many times trying to make the perfect concoction and now, out of their failures, many great tasting craft cocktails have been born!
  • Many craft cocktails contain a high amount of alcohol in them and are definitely a lot boozier than your standard gin and tonic. This is a good place to mention that you can definitely start to feel a bit tipsy after just one craft cocktail, even if your alcohol tolerance is fairly high.
  • There is a definite emphasis placed on the presentation of craft cocktails as well. Whether it is the color of the drink matching the garnish, the shape of the ice cubes in the drink, or the type of glassware used to house the beverage, craft cocktails are always the prettiest girl at the bar.
  • Craft cocktails almost always have at least one liqueur in them. Liqueurs add flavor, substance, and sometimes even a little bit of color to make your craft cocktail pop.
  • One of the most important aspects of a good craft cocktail is the use of fresh ingredients. From house made syrups to freshly squeezed orange, lemon and lime juices, no ingredient is overlooked in the construction of a craft cocktail. Sometimes the bars even use their own house made whiskeys or vodkas made especially for their craft cocktail menus. The ingredients don’t always have to be handmade,  but they do have to be of a certain quality and they definitely have to be fresh.
  • Craft cocktails are made with at least mid-grade booze, and most times the selections are closer to top shelf than bottom. For the amount of money you’re shelling out for one of these things, there sure as hell shouldn’t be any Popov or Jim Beam floating around in your glass.
  • Typically there are a fair amount of ingredients that go into the making of a craft cocktail. Most times there are at least four or five things that go into the drink, and some more advanced recipes call for ingredients numbering in the double digits! This also means that most worthwhile craft cocktails will take a fair amount of time to prepare.
  • The ice in your craft cocktail should look pristine. It shouldn’t look dingy or look like the bartender just bought a couple of bags from the party store a few hours back.

Where Can You Get A Craft Cocktail?

With the recent surge in popularity of craft cocktails, you don’t have to go to a basement in Manhattan and give them a secret password to enjoy a great tasting drink. There are so many restaurants that serve their own house specialties now that it’s probably harder to find a place that doesn’t serve craft cocktails than one that does!

If you are in any decently populated urban area, your options to grab a craft cocktail should be plentiful. If you live in or around a major city, they will be downright overwhelming. This is great because it allows you to try so many different variations and find out what you like and what you don’t without having to travel a great distance.

Tip: If your bartender can’t make something fairly simple like a proper Negroni or Old Fashioned, or they’re pouring orange juice from a Tropicana container, you’re probably not at a good spot for craft cocktails.

Why Are Craft Cocktails So Expensive?

Well folks, there’s really no getting around this one. Craft cocktails are definitely more expensive than your standard Jack & Coke. There are a couple main reasons for this discrepancy in price.

The main reason would be the quality of ingredients that are used in the drink. As we read above, a lot of things in the cocktail are made by hand or are “top shelf” options. Those things are always going to cost more, plain and simple.

Another reason craft cocktails cost a lot is that there are many more ingredients in them than most other drinks. Typical drinks consist of just a few (two or three) elements, whereas most craft cocktails usually have at least five ingredients, and many have significantly more. 

Tip: Remember, just because a drink might be expensive it doesn’t always mean that it is a craft cocktail. I’ve definitely had to pay upwards of $15 for a whiskey and cola in places like Manhattan or South Beach, and they certainly weren’t anywhere near the quality of similarly priced craft cocktails.

Great Craft Cocktail Recipes

A simple Google search of this term will yield an overwhelming amount of craft cocktail recipes. This is a wonderful example of the uniqueness of the craft cocktail, as everyone seems to have their own way of mixing things up. They are almost like snowflakes and fingerprints in this regard, you might find something similar but you’ll never find an exact match.

Since there are literally thousands of recipes out there (way too many to list here), I would encourage you to do your own search and see what tickles your fancy. Chances are you’ll find more than a few delicious choices.

Hopefully this post has helped you gain a greater understanding of what a craft cocktail is and how to differentiate them from “normal” cocktails. Next time you’re out and about and see something intriguing on the drink menu, don’t be afraid to find out what it’s all about!

How Do You Make A Craft Cocktail?

This is probably a question bartenders get asked all the time but there really is no right or wrong way to make a craft cocktail. As discussed above, you really only need a few things: Good ingredients, time, and imagination. A little bit of patience would probably go a long way as well.

If you had a great drink recently but think it would have been lights out with some cinnamon in it, throw some in there and give it a try. If you have a totally off the wall idea that you think will taste great, go ahead and mix away. 

The worst that can happen is you find out it wasn’t very tasty and try again. The more times you fail the more experience you get, and with experience comes greater abilities. That’s the beauty of craft cocktails, there really is no limit to what you can do with them.

Can You Add More Yeast to Beer?

Homebrewing may be an adventure you have recently embarked on, so you know there are many different factors involved in brewing it properly. The amount of yeast has a big effect on the final product. We set out to learn what happens if you add more yeast during the fermentation process and how it affects the taste.

Can you add more yeast to beer? Yes you can. Yeast affects the alcohol content of beer. It works together with the sugar to produce alcohol. The more yeast in the beer, the lower the alcohol content in your beer.  Conversely, less yeast increases the alcohol. You must add yeast at the proper time, and never add yeast during active fermentation.

Now that you know a little more about what role yeast plays in the brewing of beer, let’s find out  some more cool things about why yeast content in beer matters and about what happens when there isn’t the right amount of yeast in beer. First though, let’s start with seeing what yeast actually is.

What is Yeast?

It would be helpful to know what yeast actually is before getting into the nitty gritty of it. Put simply, yeast is a living organism that is part of the fungus family. For the purposes of this article, there are two types of brewing yeasts, commonly known in the brewing community as top cropping and bottom cropping. 

Top cropping yeast is sometimes call “ale yeast” and is associated with producing ale style beers. Bottom cropping yeast is generally used to make lager style beers, though they are capable of producing ale style beers as well.

Beer brewers can get yeast in two types of consistencies, active yeast, sometimes referred to as “wet” yeast and dry yeast. The main difference is their shelf lives, as active yeast is only good for about two weeks while dry yeast can be stored unopened for as long as two yeas.

What Happens When You Add Too Much Yeast to Beer?

Now that we know a little bit about the basics of yeast, let’s deal with the matter at hand: Can you add more yeast to beer?

Too much yeast can alter the taste of the beer and mean that less yeast growth is occurring, possibly resulting in a taste that you didn’t originally intend for the beer. Experts call this over-pitching the yeast. The yeast goes through several cycles as it eats through the sugars. If there is too much yeast, it eats through the sugars faster without cycling properly. This can result in a less flavorful product.

It is important to watch the progress of your yeast. If your starter product works well, fermentation should continue to progress. If you add more yeast later, it does not work the same way as it does when you make a starter.

When your beer reaches a stage of active fermentation, you do not need to change anything. The process is working properly. If the process stalls, you must consider every possible problem before adding more yeast. Sometimes you simply need to start over with a yeast starter.

What is Yeast Starter?

Many brewers use yeast starter to jump start yeast growth and make sure their yeast is healthy. A starter can help you determine the quality of your yeast before it becomes a part of the brewing process. If your starter turns out bad, you can simply make a new batch, sidestepping a potential landmine down the road.

A yeast starter is typically made when dealing with wet yeast. It is basically a mini batch of beer, essentially a test run, which will make more yeast and activate the yeast to get it ready for fermentation. A starter is helpful because you can make sure the yeast is good before pitching it

Tip: While not recommended, if you are using dry yeast, you’ll need to add the appropriate amount of yeast to water to jump start it. Add the yeast to boiling water and cover with plastic wrap for about 15 minutes.

Tip: Bacteria can grow quickly in your starter container. Glass canning jars are the best container to use for a yeast starter since you can boil them. Boil your canning jars to sterilize them before you begin making the yeast starter. If you notice a foul smell while making the starter, throw it away and clean the container more thoroughly.

What is the Proper Yeast Ratio in Beer?

When you are ready to make a yeast starter or begin brewing the beer, you must find out how much yeast goes into the recipe. There are many charts online that can help you determine how much yeast to use, depending on how much beer you want to make.

An average amount of dry yeast is 2 packets per 5 gallons of beer. There are about 100 billion yeast cells in each packet. You generally need about 200 billion. You also need to make sure you have live cells, however, and this can usually be achieved by creating a yeast starter as described above.

If your yeast is old or stored improperly, it may not respond as well. You may need to use more or purchase a fresh batch. If there is no reaction while making a starter, sanitize your container and start over with fresh yeast.

What Happens if I Don’t Use Enough Yeast?

A smaller amount of yeast makes the fermentation take longer yet produces a higher alcohol content. The fermentation process can even stop completely if there is too little yeast. You may think you’ve added enough yeast, but some poor quality yeasts don’t have the necessary cells to keep the process going.

Always keep in mind that when brewing beer, the primary goal is to achieve a good taste, not necessarily to reach a high alcohol level. This basically means to make sure you have enough yeast to ensure a high quality brew, while keeping the alcohol content at a tolerable level. We aren’t trying to make Pappy’s old moonshine here!

How Long Does Yeast Last?

When the brewing process goes wrong, bad yeast is often the culprit. Follow these simple instructions to know whether your yeast is ready for use.

Dry yeast typically keeps for around two years if kept in a cool and dry place like a pantry or even a refrigerator. Make sure to store open jars of dry yeast in the refrigerator to keep them fresh. If dry yeast that has been opened has changed its color or you notice wet clumps, get rid of it immediately.

When dealing with fresh yeast (wet yeast), you have about 3 weeks of shelf life before it goes bad. You should definitely try to use it at its freshest to ensure a quality product. Fresh yeast should be stored in the refrigerator if it is going to be used within a week.

It is important to use quality ingredients in everything you make, and that is especially true with the yeast you are using to brew your beer. Making sure you check the dates on everything you buy and storing it properly will go a long way in ensuring your brewing process goes off without a hitch!

Well guys and gals, I definitely learned a lot about the role of yeast in beer brewing while writing this article and I hope you folks did as well.

Making sure the yeast is behaving properly is an extremely crucial part of the brewing process and I hope that the information above helped you figure out if you can add more yeast to your beer.

Why Do Beer Steins Have Lids? | Here’s the Reason

Why do beer steins have lids main banner

I was at a friend’s house the other day and he was drinking beer out of a beautifully crafted beer stein which happened to have a lid on it. I asked him why the beer stein had a lid on it and he had no idea. I was curious so I did a little digging and found out some really neat things about beer steins, but first let’s get to the question at hand.

This is why beer steins have lids: After the bubonic plague struck Europe, several infestations of flies and mosquitos landed as well. To protect against the dangerous insects and as a sanitary measure, people began covering food and drink to keep out diseased flies. The beer stein lid was born. The lids come in handy now for preventing spillage and keeping the beer at a constant temperature.

Beer steins are beautifully decorated with different themes and although they were originally created to keep insects out of drinks, beer stein lids are highly decorative pieces that come in handy to prevent spills and warm beer. They can be made of different materials, varying styles, and a number of sizes. I’ve done a bit of research about all these things so keep reading to find out a bunch of interesting information on beer steins.

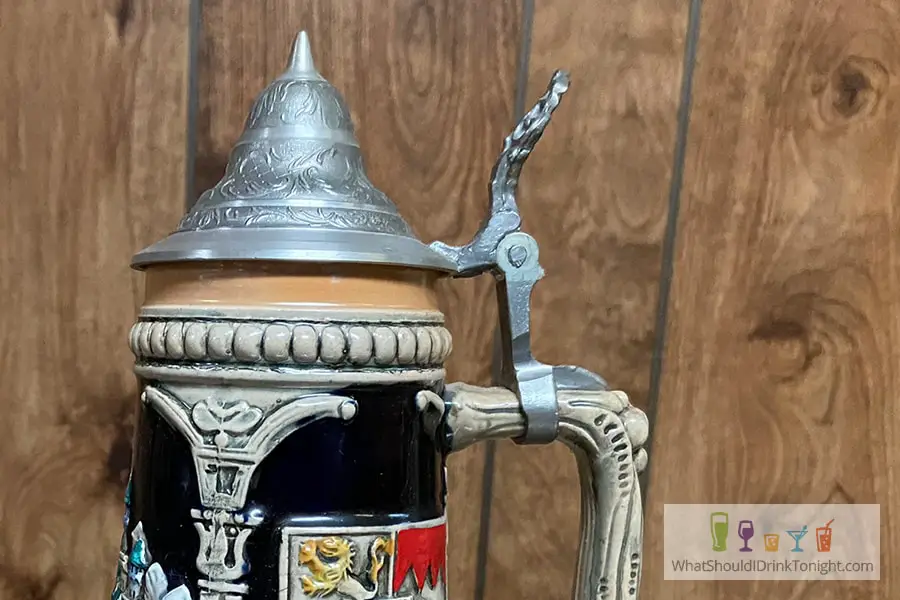
Beer stein with a lid and royal flags on the side

What Is the Lid on A Beer Stein For?

Preventing the spread of bubonic plague took all kinds of measures in the 14th century. Diseased flies were all about, and beer drinkers needed to devise protection. Today, the lids still serve a good purpose to keep fruit flies out, and they also help to keep beer at a constant temperature.

Nowadays you can find steins with or without lids, mostly serving a decorative purpose. Let’s find out a bit more about all the different kinds of beer stein lids out there.

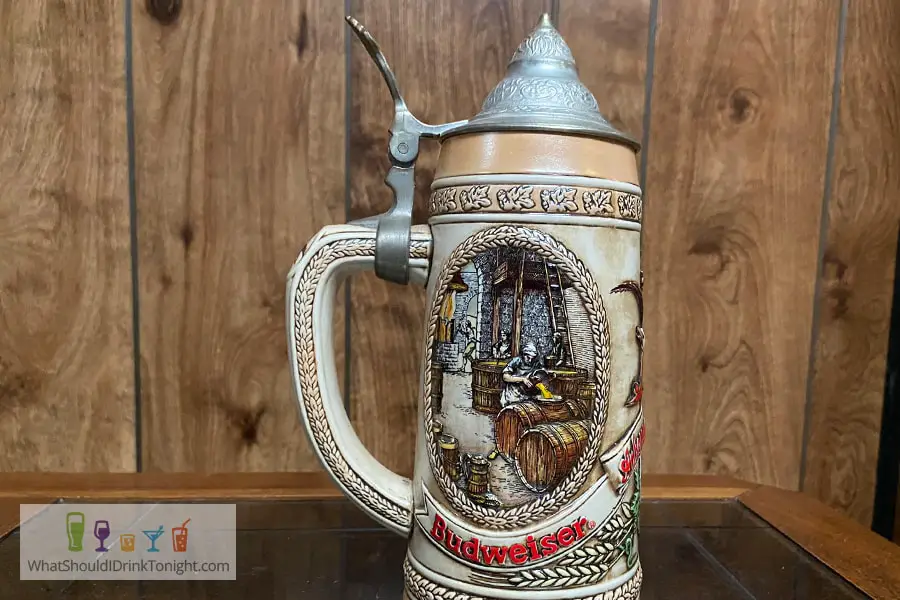
Old school Budweiser beer stein with a lid

The Many Different Beer Stein Lids

Nowadays, the lid serves the purpose of adding a nice finishing touch to the stein. There are hundreds of different lids currently available, but the vast majority can be categorized into five different types.

  • Ornamental – These lids are always pewter and are the most popular choice of lids for limited-edition type steins. The shape of this stein lid is typically conical with a finial at the top and they usually have a lot of details that require special craftsmanship. 
  • Conical – This is the cone-shaped lid that is usually made out of pewter but can also be made out of white base metal. These are the most common lids and least expensive and now are mostly machine-made. The surface gets plated with either a nickel to create a shiny finish or a pewter-like alloy to create a darker antique finish.
  • Flat – These lids are also known as semi-flat lids, as they are not entirely flat. They are typically made from pewter and have a surface that is easy to add engravings too.
  • Inlay – These are known to be very attractive lids, usually always with a pewter lid and flange with a stoneware figurine in the center.
  • Figurine – Known as a top-of-the-line lid, mostly made of pewter with a figurine mounted on top.
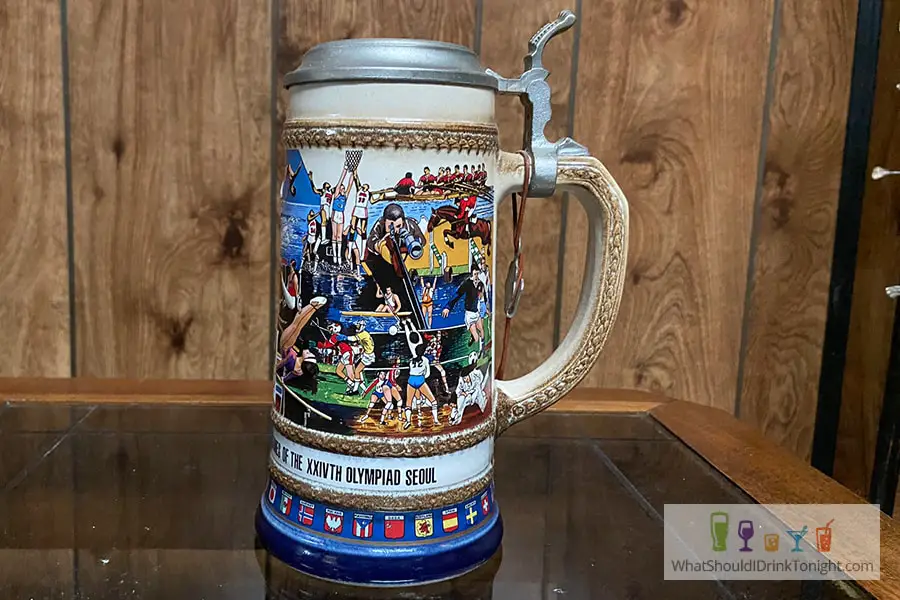
Seoul olympic beer stein with a lid

Benefits Of Beer Steins

A drinking vessel that once was used to help protect beer drinkers from the bubonic plague, beer steins have now become a staple in many pubs and breweries. Here are a few factors that make people believe that the beer stein is the perfect drinking vessel.

  • Status symbol – Back in the earlier days, people who owned a beer stein were seen as having status in the community. It showed that they were someone who could afford small luxuries in a difficult time in the world.
  • Durable – Beer steins are made with sturdy materials that are built to last through daily use.
  • Memorable experience – Beer steins make great souvenirs to remember a beer or place you have enjoyed. And since they are so durable, they’ll last a long time.
  • Better taste – Better tasting beer is all about personal preference. Those who love the traditional design and feel of a beer stein will often say that the flavor of the beer is better. It could be that the porous nature of the vessel helps add a flavor to the beer while the thick stoneware and the lid can help keep the beer at optimal temperature.
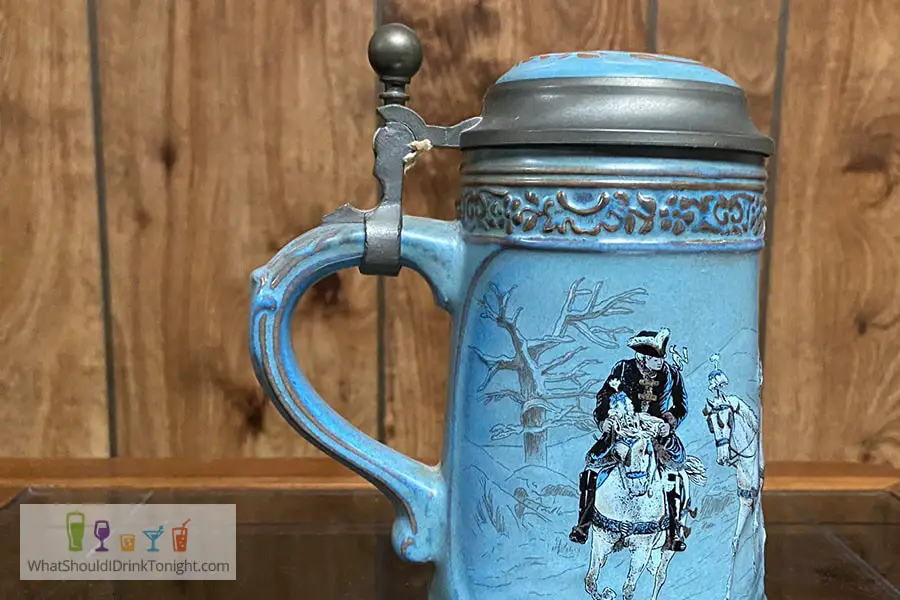
Baby blue beer stein with man riding a horse topped with a lid

Beer Stein Sizes

Metric volume is the most common method of sizing a beer stein; one metric liter is 33.8 ounces. The most popular sizes of beer steins are the ¼ liter (8.5 oz), ½ liter (16.9 oz), ¾ liter (25.4 oz) and 1 liter (33.8 oz). The half-liter size is the most popular.

History of the Beer Stein Lid

As briefly mentioned in the opening section, after the 14th century, as a reaction to the plague, there was a law established in Germany that required any beverage containers to be covered for sanitary purposes. At that same time, different techniques to improve earthenware created stoneware, which then created the presence of stoneware drinking vessels.

By the end of the 19th century, the stein was defined as being made in Europe crafted from different materials like pewter, mainly in England, and glass, porcelain, and silver elsewhere in the region.

Over the centuries, many stein-decorating styles and techniques were developed and refined, resulting in the wide variety of craftwork and artistry we see today.

Seoul olympic beer stein with a lid

Types of Beer Stein Material

There are many different kinds of beer steins made these days. A lot of them serve the purpose of decoration or are given as souvenirs from different breweries. Many beer steins are still made with lids, while some are made without. Here are the different materials used to make most beer steins.

Pewter

Pewter is a compound consisting of tin, copper, and antimony. In Europe, pewter has a minimum of 92% tin and copper and antimony are added to harden the metal. The higher tin content means a more silvery color.

These steins are component cast, meaning that the lids, bodies, handles, and ornamentation are all separately made.

Crystal

Crystal is a clear, high-quality glass. The body of these steins are hand-cut, and either hand-engraved or engraved by a mold. Usually, these are mouth-blown and case-hardened with a transparent coloring on the exterior.

Glass

Glass is the least expensive of the most popular material used. Glass bodies and handles are made from a mold, and the lid is often attached by machine. The bodies are usually transfer-decorated which are the only handwork that is involved.

Ceramic

Ceramic steins fall into one of five categories according to the quality of the ceramic mass, raw materials, firing temperature, color, and density of the mass.

  • Earthenware – Fired at a temperature around 1,000 °C, this is a colored mass that is porous until it is glazed.
  • Ceramics – Fired at about 1,050 °C – 1,080 °C, this is a slightly porous, light-colored ware that must be glazed to be impermeable.
  • Creamware – Fired at 1,150 °C and then again at 1,180 °C without a glaze and then decorated and fired again at around 900 °C-1,000 °C. This is a white earthenware with a lead glaze.
  • Stoneware – Fired in high temperatures of 1,200-1,400 °C, this hard material becomes glass-like and has a result product of less than 2% porous so that glaze is not mandatory.
  • Porcelain – Fired at temperatures of 1,300-1,400 °C, true porcelain is made of kaolin and petuntse. These ingredients produce a white, more or less translucent, glass-like material.

Ceramic Stein Decorations

There are a few different techniques used to decorate the body of a ceramic stein.

  • Raised relief – This three-dimensional technique is easily the most popular. A highly detailed decorative area is raised above the background of the stein.
  • Transfer decoration or decal decoration. The least expensive of the decorations. Because of modern technology, we can now produce great details of portraits, paintings, and photography that gets transferred onto the stein quite easily.
  • Incised decoration or etched-decoration. This is a more complex and expensive technique, so it is not as popular. The subject outline of the stein is etched by hand into the body.

Well that pretty much exhausts my knowledge about beer steins and why they have lids on them. Hopefully next time you are enjoying a brew in a beer stein you can impress your friends with all you’ve learned here today!